The fuser unit in a laser printer is a critical component responsible for bonding toner to paper, and its lifespan can vary significantly. Generally, you should expect to replace your laser printer’s fuser unit every 100,000 to 300,000 pages, though this can be influenced by printer model, usage patterns, and environmental factors.
Understanding the Fuser Unit’s Role
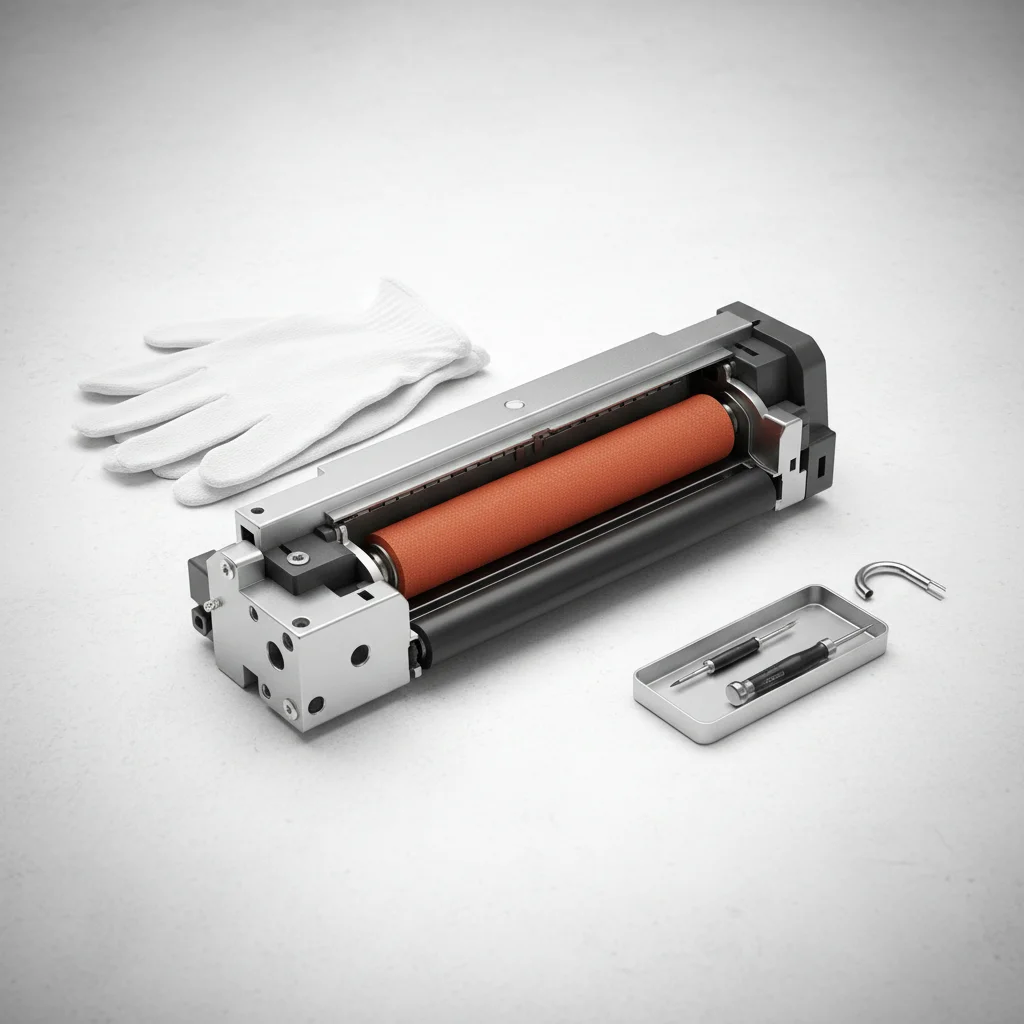
The fuser is essentially a heating element and pressure roller system. After the toner is applied to the paper, it passes through the fuser, where heat and pressure melt and permanently fuse the toner particles onto the paper’s surface. This process is what makes laser prints durable and smudge-proof. Over time, the fuser’s heating elements can degrade, or the non-stick coating on its rollers can wear down, leading to print quality issues or complete failure.
Signs It’s Time for a Fuser Replacement
Several indicators suggest your fuser unit might be nearing the end of its life. Common signs include toner not adhering properly to the paper, resulting in smudged or faded prints that can be easily rubbed off. You might also notice repetitive marks or streaks on your prints, which can be caused by damage to the fuser’s rollers. Another clear sign is an error message on your printer’s display, specifically indicating a fuser error or a fuser life warning. Pay attention to any unusual noises coming from the printer during the printing process, as this could also point to a failing fuser.
Factors Affecting Fuser Lifespan
|
Our Picks for the Best Laser Printer in 2026
As an Amazon Associate I earn from qualifying purchases.
|
||
| Num | Product | Action |
|---|---|---|
| 1 | Brother HLL3280CDW Wireless Compact Color Laser Printer, Duplex, Mobile Printing & Ethernet | Includes 2 Month Refresh Subscription Trial¹, Amazon Dash Replenishment Ready (Renewed Premium) |

|
| 2 | Brother HLL6210DW Business Monochrome Laser Printer with Large Paper Capacity, Wireless and Gigabit Ethernet Networking, Advanced Security Features and Mobile Printing (Renewed Premium) |
|
| 3 | HP LaserJet MFP M235sdw All-in-One Laser Wireless Printer, Scan/Copy, Black & White, Duplex, Best-for-Office |
|
| 4 | Brother HL-L2460DW Wireless Compact Monochrome Laser Printer with Duplex, Mobile Printing, Black & White Output | Includes Refresh Subscription Trial(1), Works with Alexa |
|
| 5 | HP Laserjet MFP M234dw Wireless Printer, Print, scan, Copy, Fast speeds, Easy Setup, Mobile Printing, Best-for-Small Teams, Instant Ink Eligible |
|
| 6 | Canon imageCLASS MF284dw Wireless Black & White Laser Printer – All-in-One for Home Use, Print/Copy/Scan, 2-Sided Printing, 35 PPM, Auto Doc Feeder, Mobile Device Compatible, Starter Toner Included |
|
| 7 | Brother DCP-L2640DW Wireless Compact Monochrome Multi-Function Laser Printer with Copy and Scan, Duplex, Black & White Output | Includes Refresh Subscription Trial(1), (Renewed Premium) |
|
| 8 | Brother DCP-L2640DW Wireless Compact Monochrome Multi-Function Laser Printer with Copy and Scan, Duplex, Mobile, Black & White | Includes Refresh Subscription Trial(1), Works with Alexa |
|
| 9 | Brother MFC-L2820DW Wireless Compact Monochrome All-in-One Laser Printer with Copy, Scan and Fax, Duplex, Black & White | Includes Refresh Subscription Trial(1), Works with Alexa |
|
| 10 | Brother HL-L2405W Wireless Compact Monochrome Laser Printer with Mobile Printing, Black & White Output | Includes Refresh Subscription Trial(1), Works with Alexa |
|
The lifespan of a fuser is not static. High-volume printing environments, such as busy offices, will naturally see fusers wear out faster than those in a home office with infrequent use. The type of paper used can also play a role; very thick or textured paper can put more stress on the fuser. Additionally, maintaining a clean printer environment and performing regular, recommended maintenance can help extend the fuser’s life. Always refer to your printer’s manual for specific page yield estimates for its fuser unit.
The Replacement Process
Replacing a fuser unit can range from a simple, user-friendly process to a more complex task requiring a service technician, depending on your printer model. Many office-grade laser printers are designed with easily accessible, user-replaceable fuser kits. Always ensure the printer is turned off and unplugged before attempting any internal maintenance. Allow the fuser to cool down completely, as it operates at very high temperatures. Consult your printer’s service manual for detailed, step-by-step instructions. If you’re uncomfortable performing the replacement yourself, it’s always best to contact a qualified technician.
- Turn off and unplug the printer.
- Allow the fuser to cool down completely (at least 30 minutes).
- Locate the fuser unit access panel (refer to your printer manual).
- Carefully remove the old fuser unit.
- Install the new fuser unit, ensuring it clicks into place.
Choosing the Right Replacement Fuser
When it’s time to replace your fuser, always opt for genuine OEM (Original Equipment Manufacturer) parts if possible. While third-party fusers might be cheaper, they can sometimes lead to compatibility issues, reduced print quality, or even damage to your printer. Verify the part number against your printer model to ensure you purchase the correct fuser. Investing in a quality replacement will help maintain your printer’s performance and extend its overall operational life.Consider purchasing a fuser kit that includes any necessary rollers or cleaning components for a complete refresh.
Get our weekly buyer guide
Practical specs, not advice. Unsubscribe anytime.