Cleaning your laser printer’s transfer belt is a crucial maintenance step that should be performed every 50,000 to 100,000 pages, or whenever you notice streaks, smudges, or faded areas on your prints. A dirty transfer belt can significantly degrade print quality and shorten the lifespan of other printer components. This guide will walk you through the process of safely cleaning this essential part.
Understanding the Transfer Belt’s Role
The transfer belt is a critical component in color laser printers, responsible for transferring toner from the imaging drums to the paper. In monochrome printers, a transfer roller performs a similar function. Over time, toner dust, paper fibers, and other debris can accumulate on the belt’s surface, leading to print imperfections. Regular cleaning ensures crisp, clear output and prevents potential damage to the printer’s internal mechanisms.
Gathering Your Cleaning Supplies
Before you begin, ensure you have the right tools. You will need lint-free cloths, isopropyl alcohol (99% pure), a small brush (like a soft-bristled paintbrush or a dedicated printer cleaning brush), and a pair of disposable gloves. Always consult your printer’s manual for specific instructions and warnings, as procedures can vary slightly between models.
Step-by-Step Transfer Belt Cleaning Process
|
Our Picks for the Best Laser Printer in 2026
As an Amazon Associate I earn from qualifying purchases.
|
||
| Num | Product | Action |
|---|---|---|
| 1 | Brother HL-L2405W Wireless Compact Monochrome Laser Printer with Mobile Printing, Black & White Output | Includes Refresh Subscription Trial(1), Works with Alexa |

|
| 2 | Brother HLL6210DW Business Monochrome Laser Printer with Large Paper Capacity, Wireless and Gigabit Ethernet Networking, Advanced Security Features and Mobile Printing (Renewed Premium) |
|
| 3 | Brother DCP-L2640DW Wireless Compact Monochrome Multi-Function Laser Printer with Copy and Scan, Duplex, Black & White Output | Includes Refresh Subscription Trial(1), (Renewed Premium) |
|
| 4 | Brother DCP-L2640DW Wireless Compact Monochrome Multi-Function Laser Printer with Copy and Scan, Duplex, Mobile, Black & White | Includes Refresh Subscription Trial(1), Works with Alexa |
|
| 5 | Brother MFC-L2820DW Wireless Compact Monochrome All-in-One Laser Printer with Copy, Scan and Fax, Duplex, Black & White | Includes Refresh Subscription Trial(1), Works with Alexa |
|
| 6 | Canon imageCLASS MF284dw Wireless Black & White Laser Printer – All-in-One for Home Use, Print/Copy/Scan, 2-Sided Printing, 35 PPM, Auto Doc Feeder, Mobile Device Compatible, Starter Toner Included |
|
| 7 | HP LaserJet MFP M235sdw All-in-One Laser Wireless Printer, Scan/Copy, Black & White, Duplex, Best-for-Office |
|
| 8 | Brother HLL3280CDW Wireless Compact Color Laser Printer, Duplex, Mobile Printing & Ethernet | Includes 2 Month Refresh Subscription Trial¹, Amazon Dash Replenishment Ready (Renewed Premium) |
|
| 9 | HP Laserjet MFP M234dw Wireless Printer, Print, scan, Copy, Fast speeds, Easy Setup, Mobile Printing, Best-for-Small Teams, Instant Ink Eligible |
|
| 10 | Brother HL-L2460DW Wireless Compact Monochrome Laser Printer with Duplex, Mobile Printing, Black & White Output | Includes Refresh Subscription Trial(1), Works with Alexa |
|
First, power off your laser printer and unplug it from the wall outlet to prevent any electrical hazards. Allow the printer to cool down for at least 15-20 minutes, as internal components can be hot. Open the front or side cover to access the toner cartridges and imaging unit. Carefully remove the toner cartridges and then the imaging unit, placing them on a clean, protected surface. The transfer belt is typically located beneath or integrated with the imaging unit.
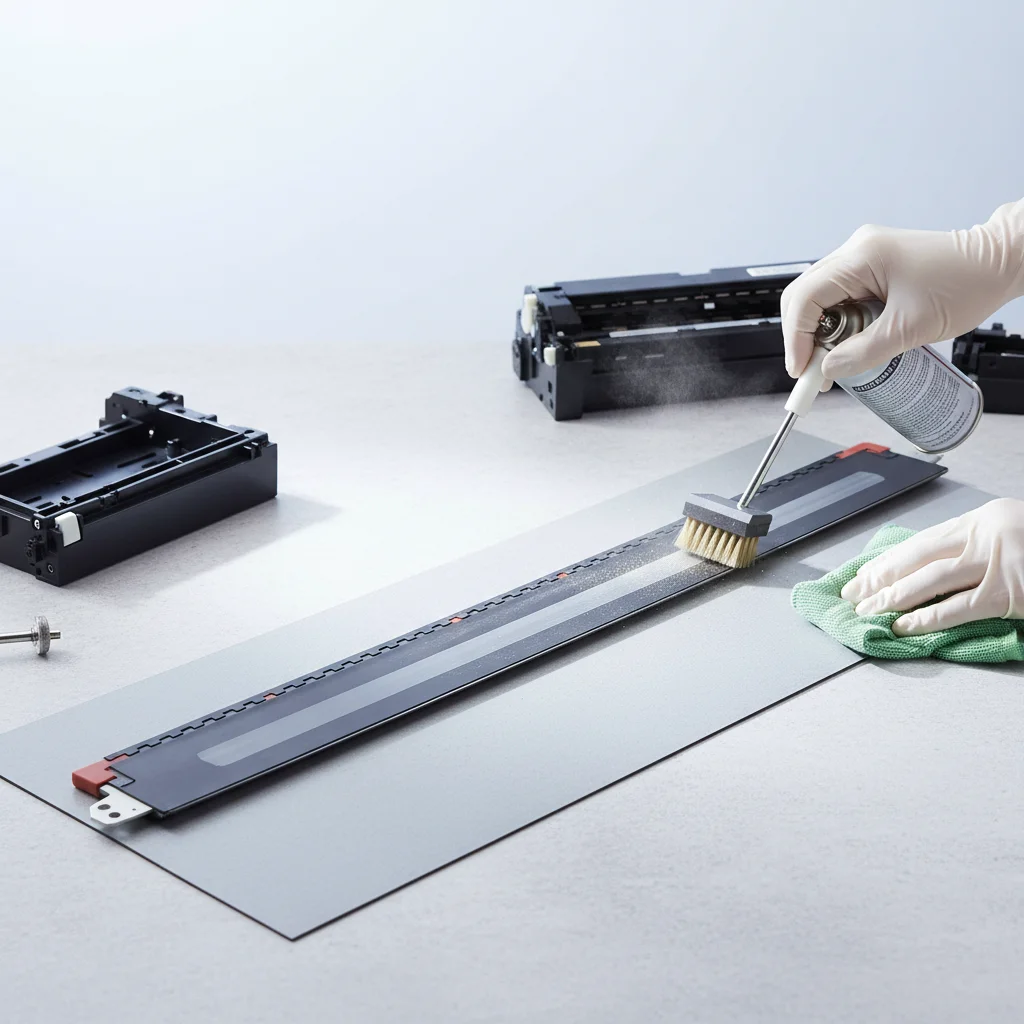
- Locate the transfer belt: It’s usually a wide, dark belt or roller.
- Gently wipe the belt: Use a lint-free cloth lightly dampened with isopropyl alcohol. Wipe in one direction, being careful not to scratch the surface.
- Remove stubborn debris: For caked-on toner or dust, use the soft brush to gently dislodge it, then wipe again with the cloth.
- Allow to dry: Ensure the transfer belt is completely dry before reassembling the printer.
Once the transfer belt is clean and dry, carefully reinsert the imaging unit, followed by the toner cartridges. Close the printer cover, plug it back in, and power it on. Print a test page to verify that the print quality has improved. If issues persist, you may need to repeat the cleaning process or consider professional servicing.
Preventative Measures for a Cleaner Transfer Belt
To minimize future build-up on your transfer belt, always use high-quality paper recommended by your printer manufacturer. Avoid overfilling paper trays, which can lead to paper jams and increased debris. Regularly clean the interior of your printer, especially around the paper path, to reduce the amount of dust and toner particles that can reach the transfer belt. Storing your printer in a clean, dust-free environment also contributes significantly to its longevity and print quality.
Get our weekly buyer guide
Practical specs, not advice. Unsubscribe anytime.